Luke Stratton
Universe of technology…
Getting Windows XP to work on modern hardware can be a challenge, specifically when it comes to driver support, even on the Dell Precision T3600 from 2012/2013 which arguably was released on the cusp of manufacturers dropping support for XP, so you’d expect there to be a chance of it working.
When I embarked on this, I spent countless hours trying to figure out how to get XP to installed in the most optimal way possible. I ran into so many pitfalls, but eventually got it working, with a compromise. I then came back 18 months later and needed to reinstall for one reason or another, but had forgotten the entire process. There’s also nowhere online that has a complete guide, so I thought I’d document it.
Note: whilst this guide is specifically focussed around the Dell Precision T3600, the process is roughly the same for others, but bear in mind driver compatibility will be your biggest issue. So try to choose hardware older than 2013 for this project.
The Dell Precision T3600 has an Intel C600 chipset, a fairly uncommon one only found in workstations and servers, which includes a storage controller, to which all the SATA ports on the motherboard map. To cut a long story short, I simply couldn’t find Intel C600 drivers which would reliably work with the XP setup. I tried everything I could think of to slipstream the drivers into an XP image, but nothing would work. I can only assume there’s either a misprint somewhere (as all the readme files seemed to suggest the drivers are compatible) or it wasn’t tested properly.
If you’ve found a way to make this work, do let me know!
If you’re not using a Precision with this chipset, you may be in luck, so do some research to find out whether your storage controller has drivers for Windows XP.
Only the first two SATA ports on the motherboard (closest to the front of the computer) support 6Gbps throughput. Additionally, the BIOS will not show you the boot option for the optical drive unless it’s connected to one of these ports. Windows XP does not like being transplanted between ports on controllers after it’s been installed, so ideally you’ll want to install it in the cabling configuration you’re going to be leaving it in. Which brings me onto my next point…
If, like me, you’re rightfully using the 6Gbps ports for SSDs and not wasting them on optical drives that get used once in a blue moon, your only option may be to install using a USB flash drive. This is also the case especially since you can end up wasting CD-RWs through numerous attempts at getting a working setup image. You also may not have access to a CD-RW drive and/or blank CD-RWs.
Two issues come with this; firstly, XP was never designed to be installed through a USB flash drive. XP was designed to be installed via a CD-ROM, accompanied by a floppy disk with extra storage controller drivers.
Secondly, there is a known bug where specific Dell computers (including this one) will not boot to the XP installer correctly via a flash drive, whether you have the correct drivers or not.
There is an easy way to at least get Windows XP working on this computer, which is to change the mode in the BIOS from AHCI to ATA (IDE). However, I generally see this as a lazy way to fix this problem as it can cause performance issues since AHCI inherently introduced performance increases.
Also, if you dual boot your PC or have other drives connected, this may not be the best option.
If you still want to go ahead with this method, the quick and dirty way is as follows:
My aim was to run multiple versions of Windows on the same computer, spanning from XP all the way to now. To do this, I had to rule out using ATA (IDE) mode.
Now, how I specifically achieved dual booting with many OSs is out of scope of this article, but I will explain how I got the drivers slipstreamed into an image and installed XP via a USB flash drive. This is the most optimal way, ensures your drives are able to operate at full speed and negates the need for the use of CDs.
You will need:
This doesn’t need to be anything special. Just a computer with the XP ISO somewhere, an internet connection and a USB port. I did most of the work on Windows 7, but I expect anything up to Windows 11 will work fine for our needs. If you run into issues with the pesky ‘Program compatibility assistant’, you might want to choose an older OS.
Fit the storage controller into the smallest PCI-E slot on the motherboard of the Dell Precision. I found using other slots caused issues when dual booting from other hard disks (this won’t necessarily be an issue for everyone). Connect the HDD or SSD to the first SATA port on the controller.
Once you have XP installed and you’re able to access the desktop, you’ve completed the hardest part. You’ll still however need to install drivers and it’s recommended to install all the available updates for stability purposes if anything.
This generally means the setup utility can’t access the USB flash drive once it loads in the drivers. This is usually due to the lack of a modified NTDETECT.COM file which is required for certain Dell computers. See the MSFN article for more details and to create the file. Ensure to follow the steps above to modify the USB flash drive with the new file.
Note: you’ll need to do two things here: specify the file in the WinSetupFromUSB Advanced Options and also manually copy the file to the path as above.
In some cases the storage controller drivers not being loaded can cause this issue. See the next point.
This most commonly means the storage controller drivers have not been loaded. It could also mean the drive hasn’t been initialised correctly. There are instructions online on how to use ‘diskpart’ to clean a drive and create a partition. Ensure the drive is using the MBR partition table and not GPT.
Ensure that the DriverPacks bundle contains the drivers for your controller. Alternatively, you may need to use another method to slipstream the drivers, such as nLite.
Some of the most common issues have been documented on WinSetupFromUSB’s FAQs page.
If you’re still struggling, feel free to leave a comment below.

 Some owners of ASRock motherboards have installed Windows 8 / 8.1, only to find that despite installing drivers, no sound can be heard from the audio controller.
To resolve this, ASRock has released a little known fix which, after executing, will make a change to the operating system to allow audio to play.
The fix can be downloaded below:
Download ASRock Enable Audio Fix
Simply run the executable and reboot the machine.
This worked for my P67 Transformer motherboard.
Disclaimer: I can accept no responsibility for any damage or data loss caused by the installation of this fix.
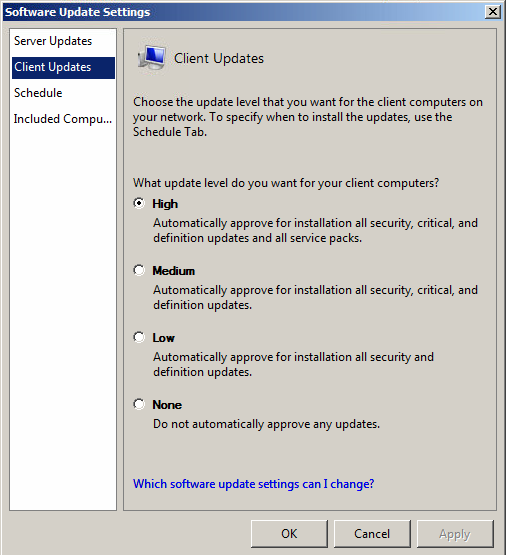
Most updates can be auto approved using an option in the SBS Console
The inclusion of WSUS in Windows SBS (Small Business Server), is extremely useful for larger small business networks of more than 5 machines, and provides functionality for installation of all applicable Windows Updates to all machines on the network.
Updates can be set to be auto-approved by the SBS Console by selecting the High option in the Software Update Settings dialog. However, optional updates can never be auto-approved.
I came across a server recently with over 100 unapproved optional updates, including Internet Explorer 9/10. So in this scenario, I thought… “OK, I’ll just hold the shift key, and select them all”.. but no. In Microsoft’s infinite wisdom, this time-saving feature is not deemed important enough. Sigh.
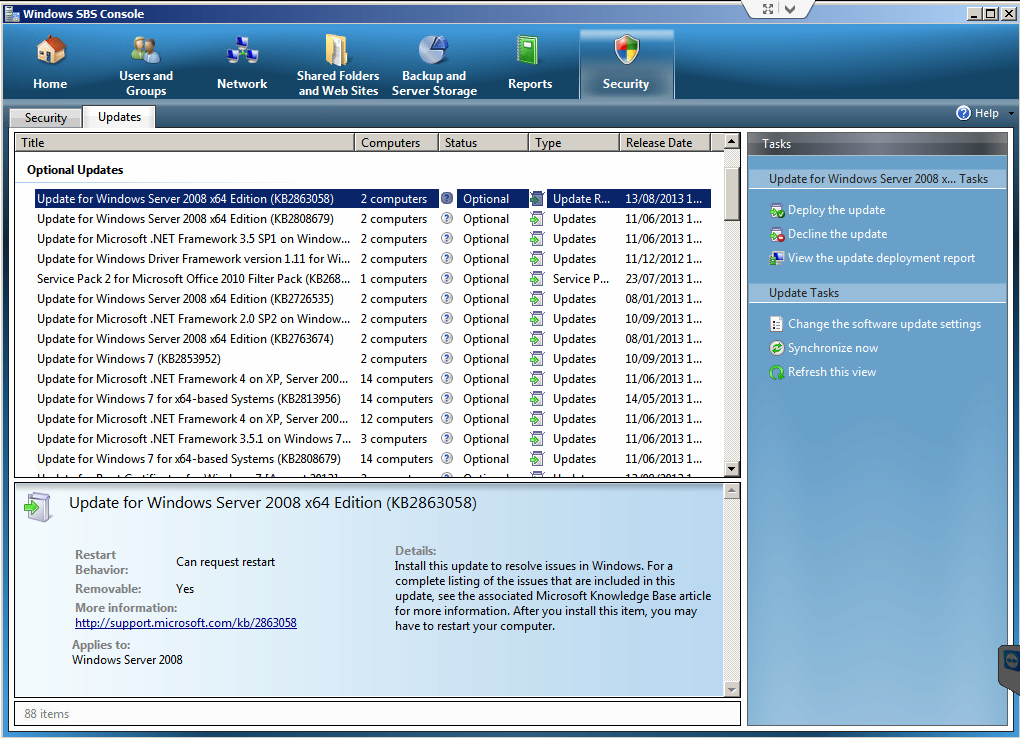
Several optional updates can pile up over a short period of time.
So, I was obviously not going to sit there clicking each update, approving it, and acknowledging two message boxes, and then waiting 10-15 seconds for the list to refresh, that would be like picking rice krispies off the floor one by one, painstaking!
To get around this problem, you can use the big boys’ tools provided by WSUS, known as the Update Services Console.
As many admins will know, SBS is a very specific and highly tuned installation of Windows Server, Exchange, WSUS and Sharepoint, so it’s not recommended to go fiddling about with stuff behind the scenes which can otherwise be done in the console, otherwise you may end up having to follow one of these repair guides. However in this situation, I think we can safely approve some updates using the native WSUS tools, however there are a couple of things you do have to watch out for.
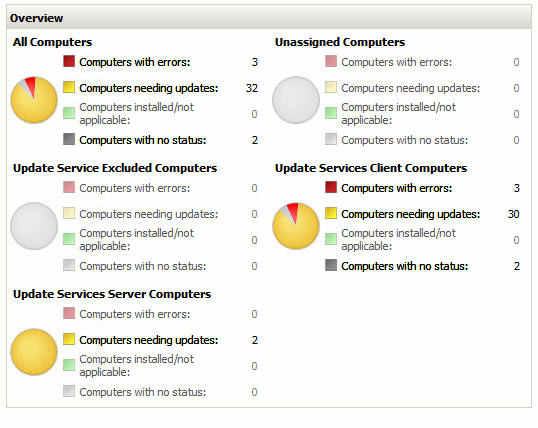
SBS’s WSUS Computer Groups
SBS creates three additional groups which it uses to control which machines receive updates, and which don’t (see right). They are fairly self explanatory, Excluded Computers can be controlled via the SBS Console, Client Computers are machines running XP, Vista, 7 or 8, and Server Computers are servers. Unassigned Computers is a default group, and is not normally used in SBS.
To approve remaining optional updates, select All Updates from the left pane, and select Unapproved, and Failed or Needed from the two drop down lists at the top of the window.
After clicking the Refresh button, you should see a similar number of updates to what is displayed in the console.
In this view, you can now use the Shift and CTRL keys to select multiple updates. Scroll through the list and select all updates which are applicable to client machines (i.e XP, Vista, 7 or 8), including any other software such as Office, and… believe it or not, Skype.
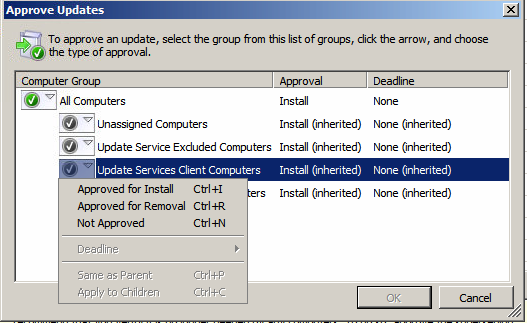
Select the appropriate group to approve the updates for.
Click the Approve button on the actions pane, and under Update Services Client Computers click the button, and select Approved for Install. Click OK, accept any license agreements, and after a few seconds you should see them all approved. Click Close, and then refresh the list. Do the same for all the server updates, except choose Update Services Server Computers.
There are some updates which may be applicable to both groups. If you are in doubt about any updates, go back to the SBS Console, refresh the list, and approve them there.
You should now end up with a clear list!
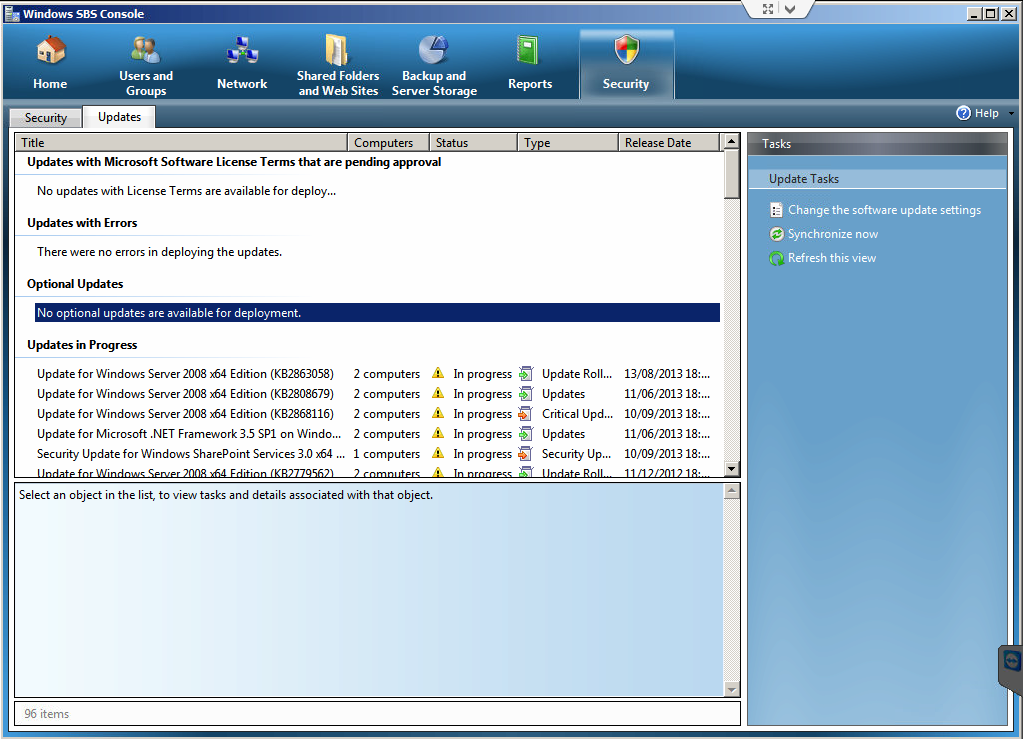
All updates have now been approved.

HTC have recognized that iTunes is the largest online music store and management system, and have provided the useful facility to sync selected playlists or all songs from iTunes to your HTC phone via HTC Sync. However, if you, like me, have the same problem whereby it only copies a few songs, follow these simple instructions:
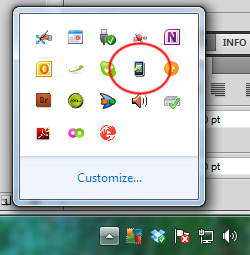
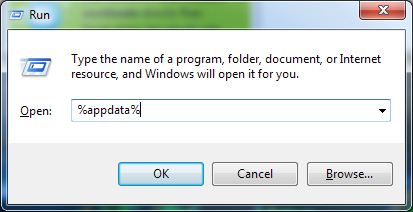

By resetting the software in this way, any problems you were previously having should now be solved.
Disclaimer: Although the instructions above should not cause you to lose data, I cannot accept responsibility for any data loss which you may encounter.

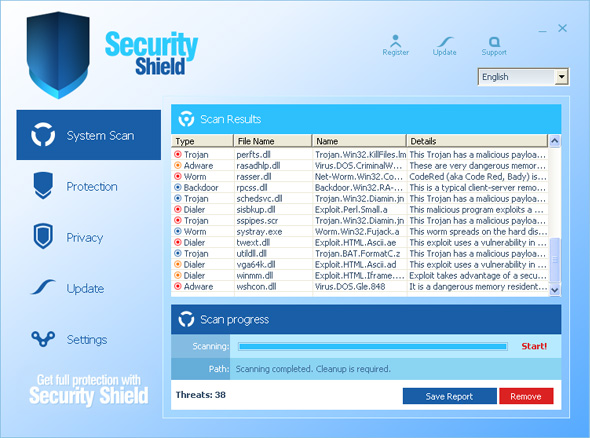
A Typical 'Fake AV' known as 'Security Shield'
I’ve had to deal with a number of nasty bits of malware recently. Most ‘Fake Anti-Virus’ infections are easy to remove, however you can never be absolutely sure that everything has been cleaned, and the malware which you think you’ve got rid of, may have installed some other nasties, like keyloggers. In this circumstance I usually recommend a full wipe of the hard drive and a re-install of Windows. The recovery partition is usually OK, however some malware can compromise this, resulting in an infected clean installation!
If you really don’t want to go ahead with re-installing Windows for whatever reason, I came across an extremely useful program which can help in the preliminary steps to disinfection.
RKill is a handy program written by Lawrence Abrams from BleepingComputer.com, which after execution, instantly ends all known malware processes. This may be useful if the malware is preventing you from running programs. You might be thinking, “But how can I run this if it blocks all programs?”. Well the answer is on RKill’s download page. They provide a number of pre-renamed versions of the application which can attempt to trick the malware into thinking it is another program.
After running RKill, it may take a few minutes before it hunts out and ‘kills’ the malware processes, however once complete, you can then run a removal tool such as MalwareBytes Anti-Malware to eliminate it.
Running RKill alone will not remove the malware from your system.
I’m not going to give the usual lecture on how to stay safe online, but just remember:

 I’ve been setting up an SQL Server for a small business, and since our server company has blocked the default port, I have had to choose an alternative. After configuring the ports in various places – Windows Firewall, SQL Configuration Manager – I found that whatever I did would not work.
After a bit of searching, I found the answer.
When entering the server name into the field, instead of using the traditional ‘host:port’ scheme, Microsoft have decided to use a non-standard approach.
The correct naming scheme is: Host,Post\InstanceName (note the comma!)
Try it, worked for me. Leave a comment if you can’t get it to work.
 I recently repaired a laptop which was blue-screening at boot and then looping round and round. I tested the RAM and Hard drive and both seemed fine, so, since it was XP I decided to try and run a Windows repair. All went well until I came to the logon screen. I clicked the username to log on, and up popped the all familier “This copy of Windows must be activated with Microsoft before you can log on. Do you want to activate Windows now?” message. I clicked ‘Yes’ and after a bit of churning, nothing happened. So, what should I do? I couldn’t get into Windows at all, not even in Safe Mode, so after a bit of searching around I came across the solution:
After I had completed these steps, I still could not open the Activation window in order to activate the copy of Windows. So after a bit more searching around, it became apparent that the Activation dialog is dependent on Internet Explorer, and since after I had discovered that IE was not working, it became obvious to reinstall it.
I hope this helps.
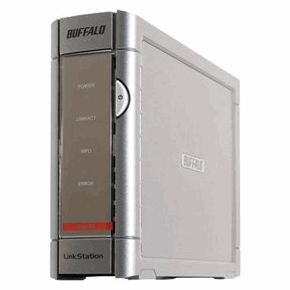
I recently came across a problem with a Buffalo LinkStation Live.
When I plugged the NAS into my computer, and ran the Buffalo NAS Navigator, it reported that the drive was in ‘EM Mode’. After several hours of fiddling around, I eventually managed to get it up and running again.
The only way to do this is to either upgrade or flash the firmware. Don’t worry, the process is safe and shouldn’t damage any of your data.
Here’s how I did it (you must have a Windows PC to hand to perform the operation):
Hope this helps.
Please note: I accept NO responsibility for any lost data, since it is your own choice if you decide to take the steps above. I am simply providing them as a reference/help to anyone who has the same problem.
Ever since I was about 8 years old, I have wanted my own website. The problem was, if I wanted a proper domain name and hosting, I would have had to pay a yearly fee. On top of that would be hosting, and that was just far too expensive for how old I was then. Now, nearly 16, I can more or less afford hosting.
I bought my domain name in May this year, and from then on, I have been using email with it using Google Apps, an excellent way to link certain Google services to a domain name. Many businesses use this as a low cost method of giving employees an individual email account/calendar etc. Although this is a tempting offer, there is one thing which you must bear in mind. To add Google Apps, you must make sure that your domain provider lets you edit the DNS (domain name system) of your domain name. It’s unlikely that they don’t, but as luck would have it, the company I had chosen (UK2) didn’t let it’s customers do this without paying an annual fee of something like £14. I thought this was ridiculous, so I emailed them, and, after several days, they told me that there were various free DNS services which I could sign up for.
I signed up for one of these, and eventually, I managed to get it set up. I did at one point, try to move my domain name to another provider, but UK2 told me that I would have to pay another ridiculous fee of £14 to move it.
I stayed with Google Apps on my domain name, and this blog, until now, when I decided I would quite like some webspace. I had a look at some hosting providers, and actually found that GoDaddy.com was the best deal, with 10GB Space, 300GB Bandwidth, full ASP.NET/PHP (web scripting languages) support, and 11 SQL Databases (10 MySQL, 1 MSSQL). So I signed up for this, and, after a bit of DNS tweaking I managed to get the site up and running.
I installed WordPress, which as you can see, is what has made this blog look different, and much better, compared to Blogger.
I hope to set up a proper website in the near future, so watch this space!
 I’ve had a good few days reinstalling Microsoft Windows. A friend bought the vast improvement, Windows 7 and received it on the day of release. This meant backing up and wiping the entire pc.
Thankfully, he had a second hard drive which meant we could just copy all the files that were needed straight to that hard drive, and since it was about 320GB, he had enough space to replicate it all.
I’m now taking on the challenge of reinstalling my laptop, which is a complete mess. I have files and folders which I use scattered across the hard drive and programs which I have installed and used once (an annoying habit of mine). This has resulted in the entire laptop being 50% slower than it should be. There’s nothing like a clean install of Windows to speed up your pc.
Since I have been doing this, I though I would write a few tips, which will prevent you from going wrong:
These can all be bought for around £60-£80 from sites such as Amazon.co.uk and Ebuyer.com.
After all that, you should be done. I agree it is a mammoth task, but once it’s done, you will never regret it… unless you’ve forgotten that important folder with all of your work in!!